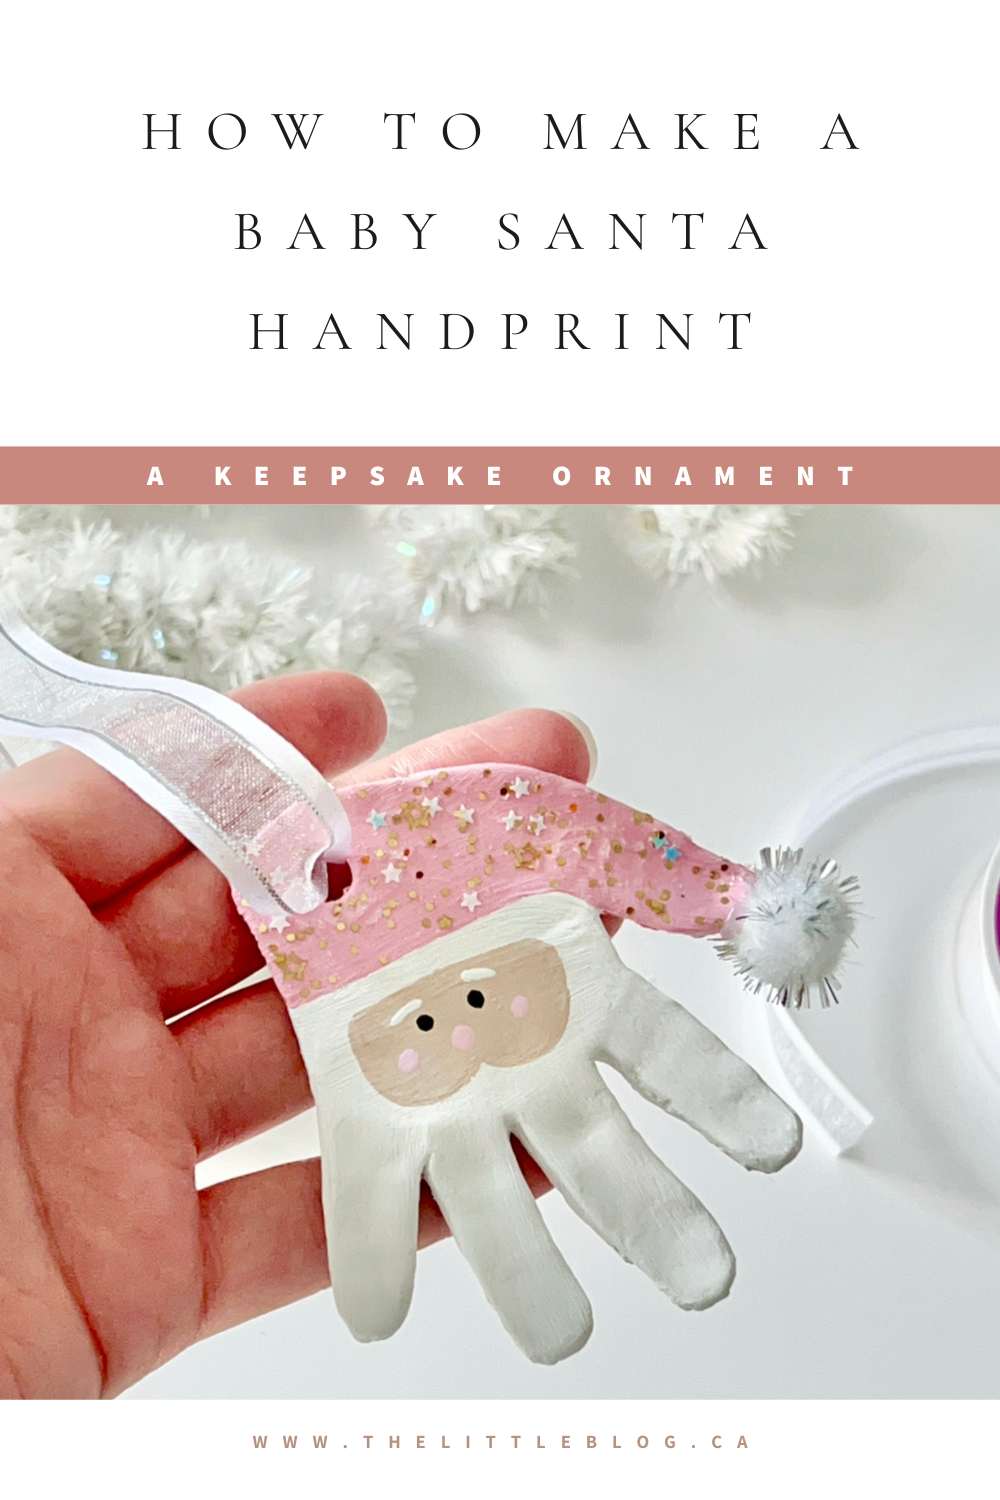
How cute are baby hands? I think we can all agree that tiny little baby hands are the most adorable thing ever. With this being my daughter’s first Christmas, I wanted to mark the occasion and do a fun DIY with her handprint to give us the memory of how small she was for her first one. Read below to see how we made her Santa handprint.
Pin for Later:
How to Make a Baby Santa Handprint
If you saw my blog post about how I made a ghost handprint for my daughter’s first Halloween, it’s similar to that!
Items You’ll Need:
Step 1: Getting Started on Your Handprint
The Crayola clay is super easy to use and I love it for all my DIYs now. You can definitely make your own dough for these types of crafts but it’s more time consuming in my opinion and every free minute I have is precious these days, lol.
Working with the Crayola clay, roll a gold sized ball and then flatten onto parchment paper. Take your baby’s hand and gently press down making sure you get the whole hand imprint.
After you’ve achieved your handprint, carefully cut it out using a butter knife. You can always trace a circle around it and do it that way but I like the look of cutting the handprint out. If you’re choosing to make this an ornament, don’t forget to poke a hole in the palm for the ribbon to thread through.


The Crayola clay suggests 2-3 days for drying, but I let mine dry for 24 hours and it seemed to be okay.
Step 2: Paint Your Baby Santa Handprint
Here comes the fun part of bringing your Santa to life! Flip the handprint upside down so the palm is at the top and the fingers become the beard. I traced a line that would be the bottom of his hat to give myself a guide for when I painted. Paint accordingly using whatever colours you’d like. I chose to do a pink Santa hat with clear gold star glitter paint on top to give it a little extra something.

To paint the face, I used a light brown shade and then painted two small black eyes, white eyebrows, and light pink cheeks and nose. To paint the details on the face, I used a toothpick because it’s small with a thin point. Because the toothpicks are tiny, keep tracing what you’re doing to thicken up the lines.


Step 3: Add Embellishments to Your Santa Handprint
Once you’ve finished painting, you’re 90% complete! I added a white glitter pom pom to the end of her thumb for Santa’s hat. This doesn’t need to be done but certainly adds to the look. Next up, I added ribbon to the top of the hat through the poked hole. Glue gun the ribbon together and that’s it! Your super cute baby Santa handprint is complete.


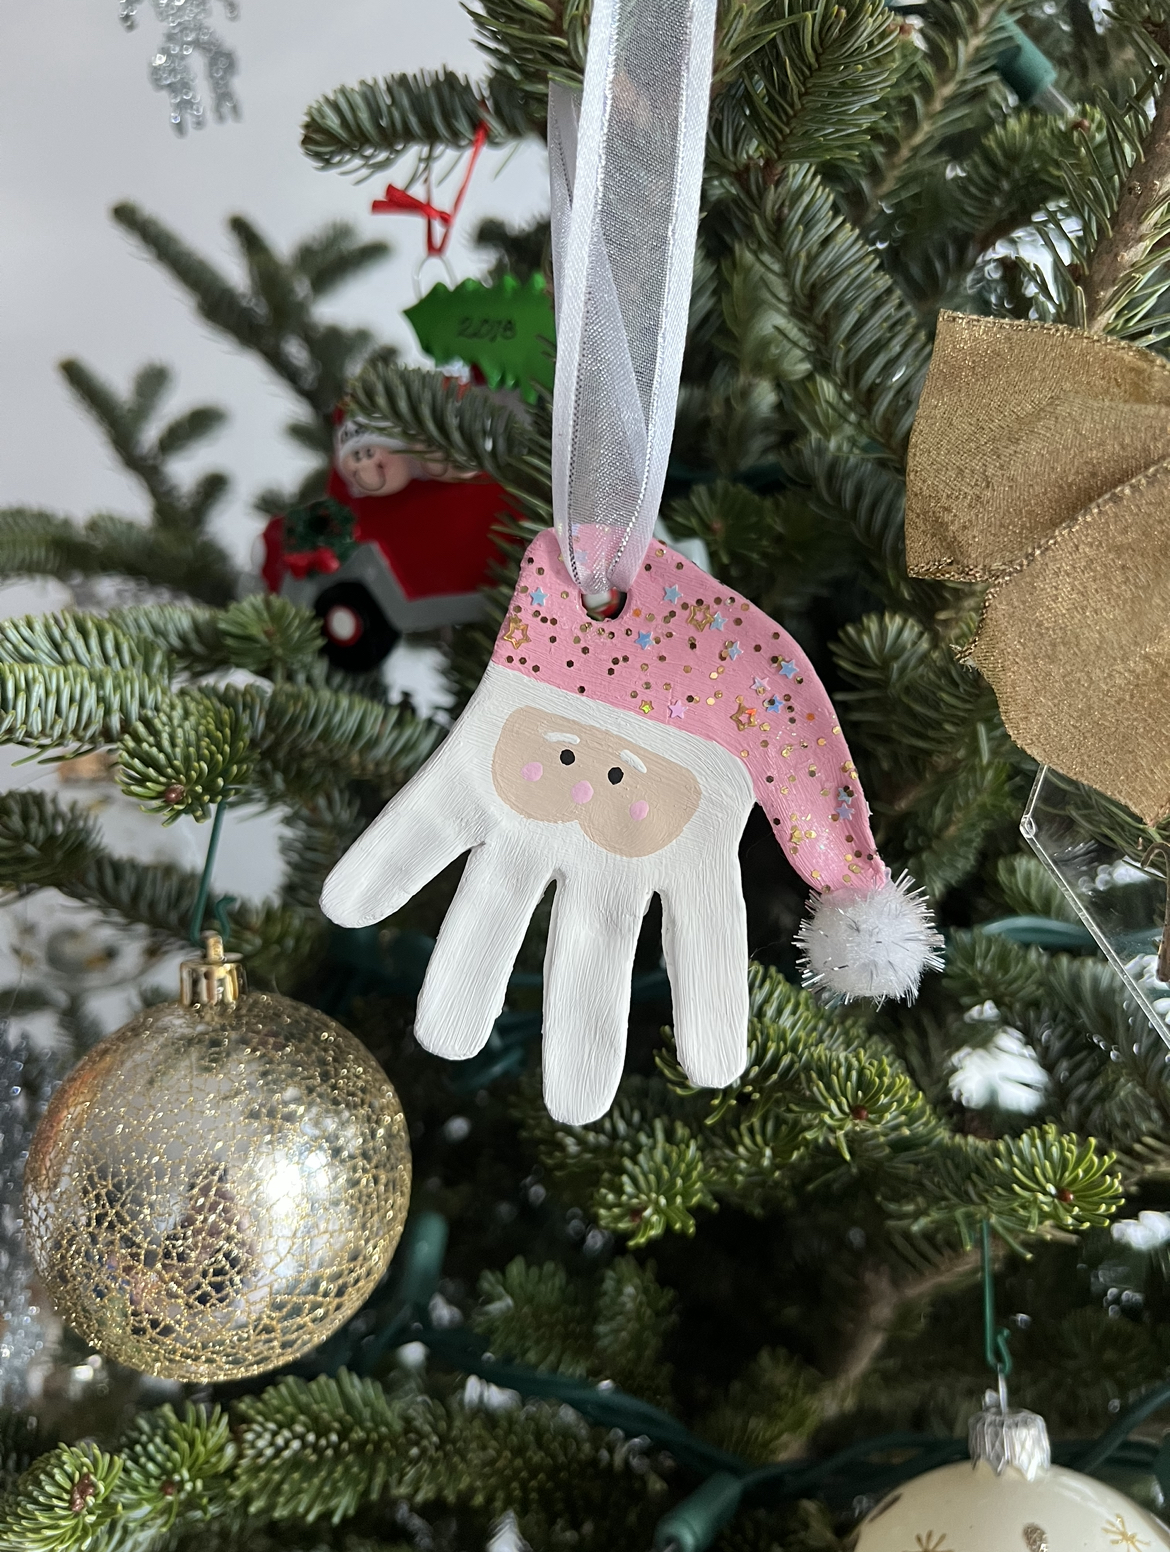
Last but not least, hang it on your Christmas tree for years to come!
