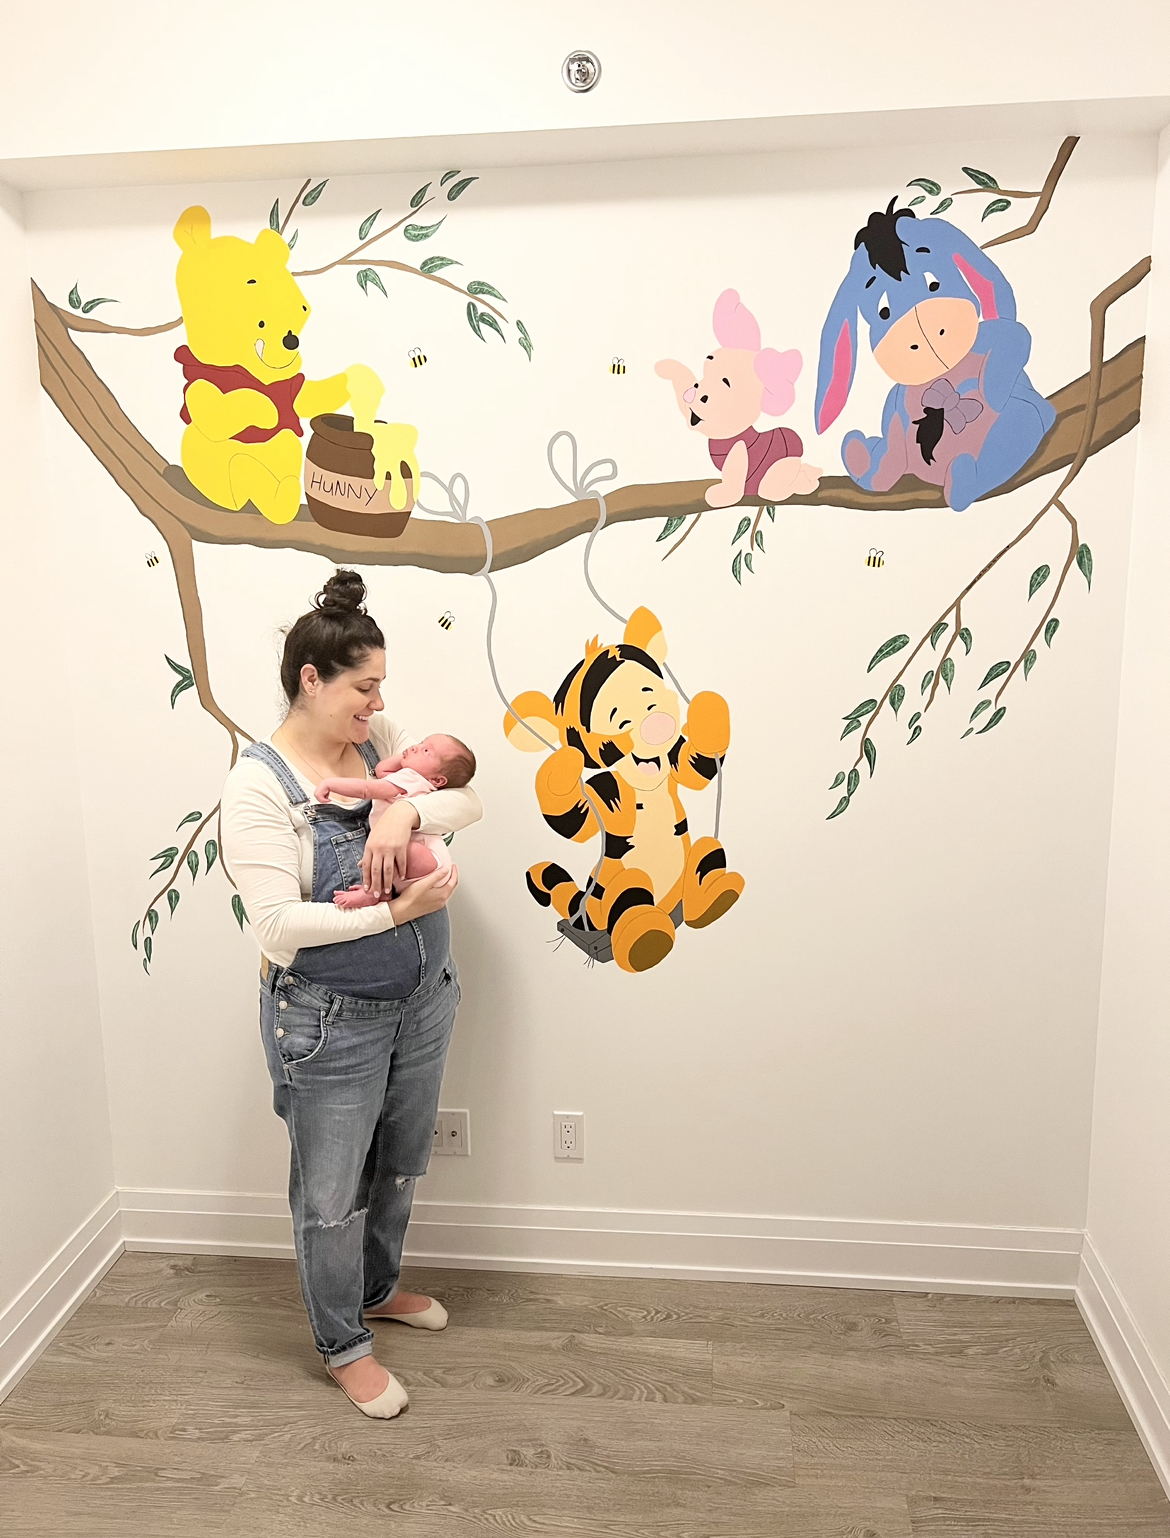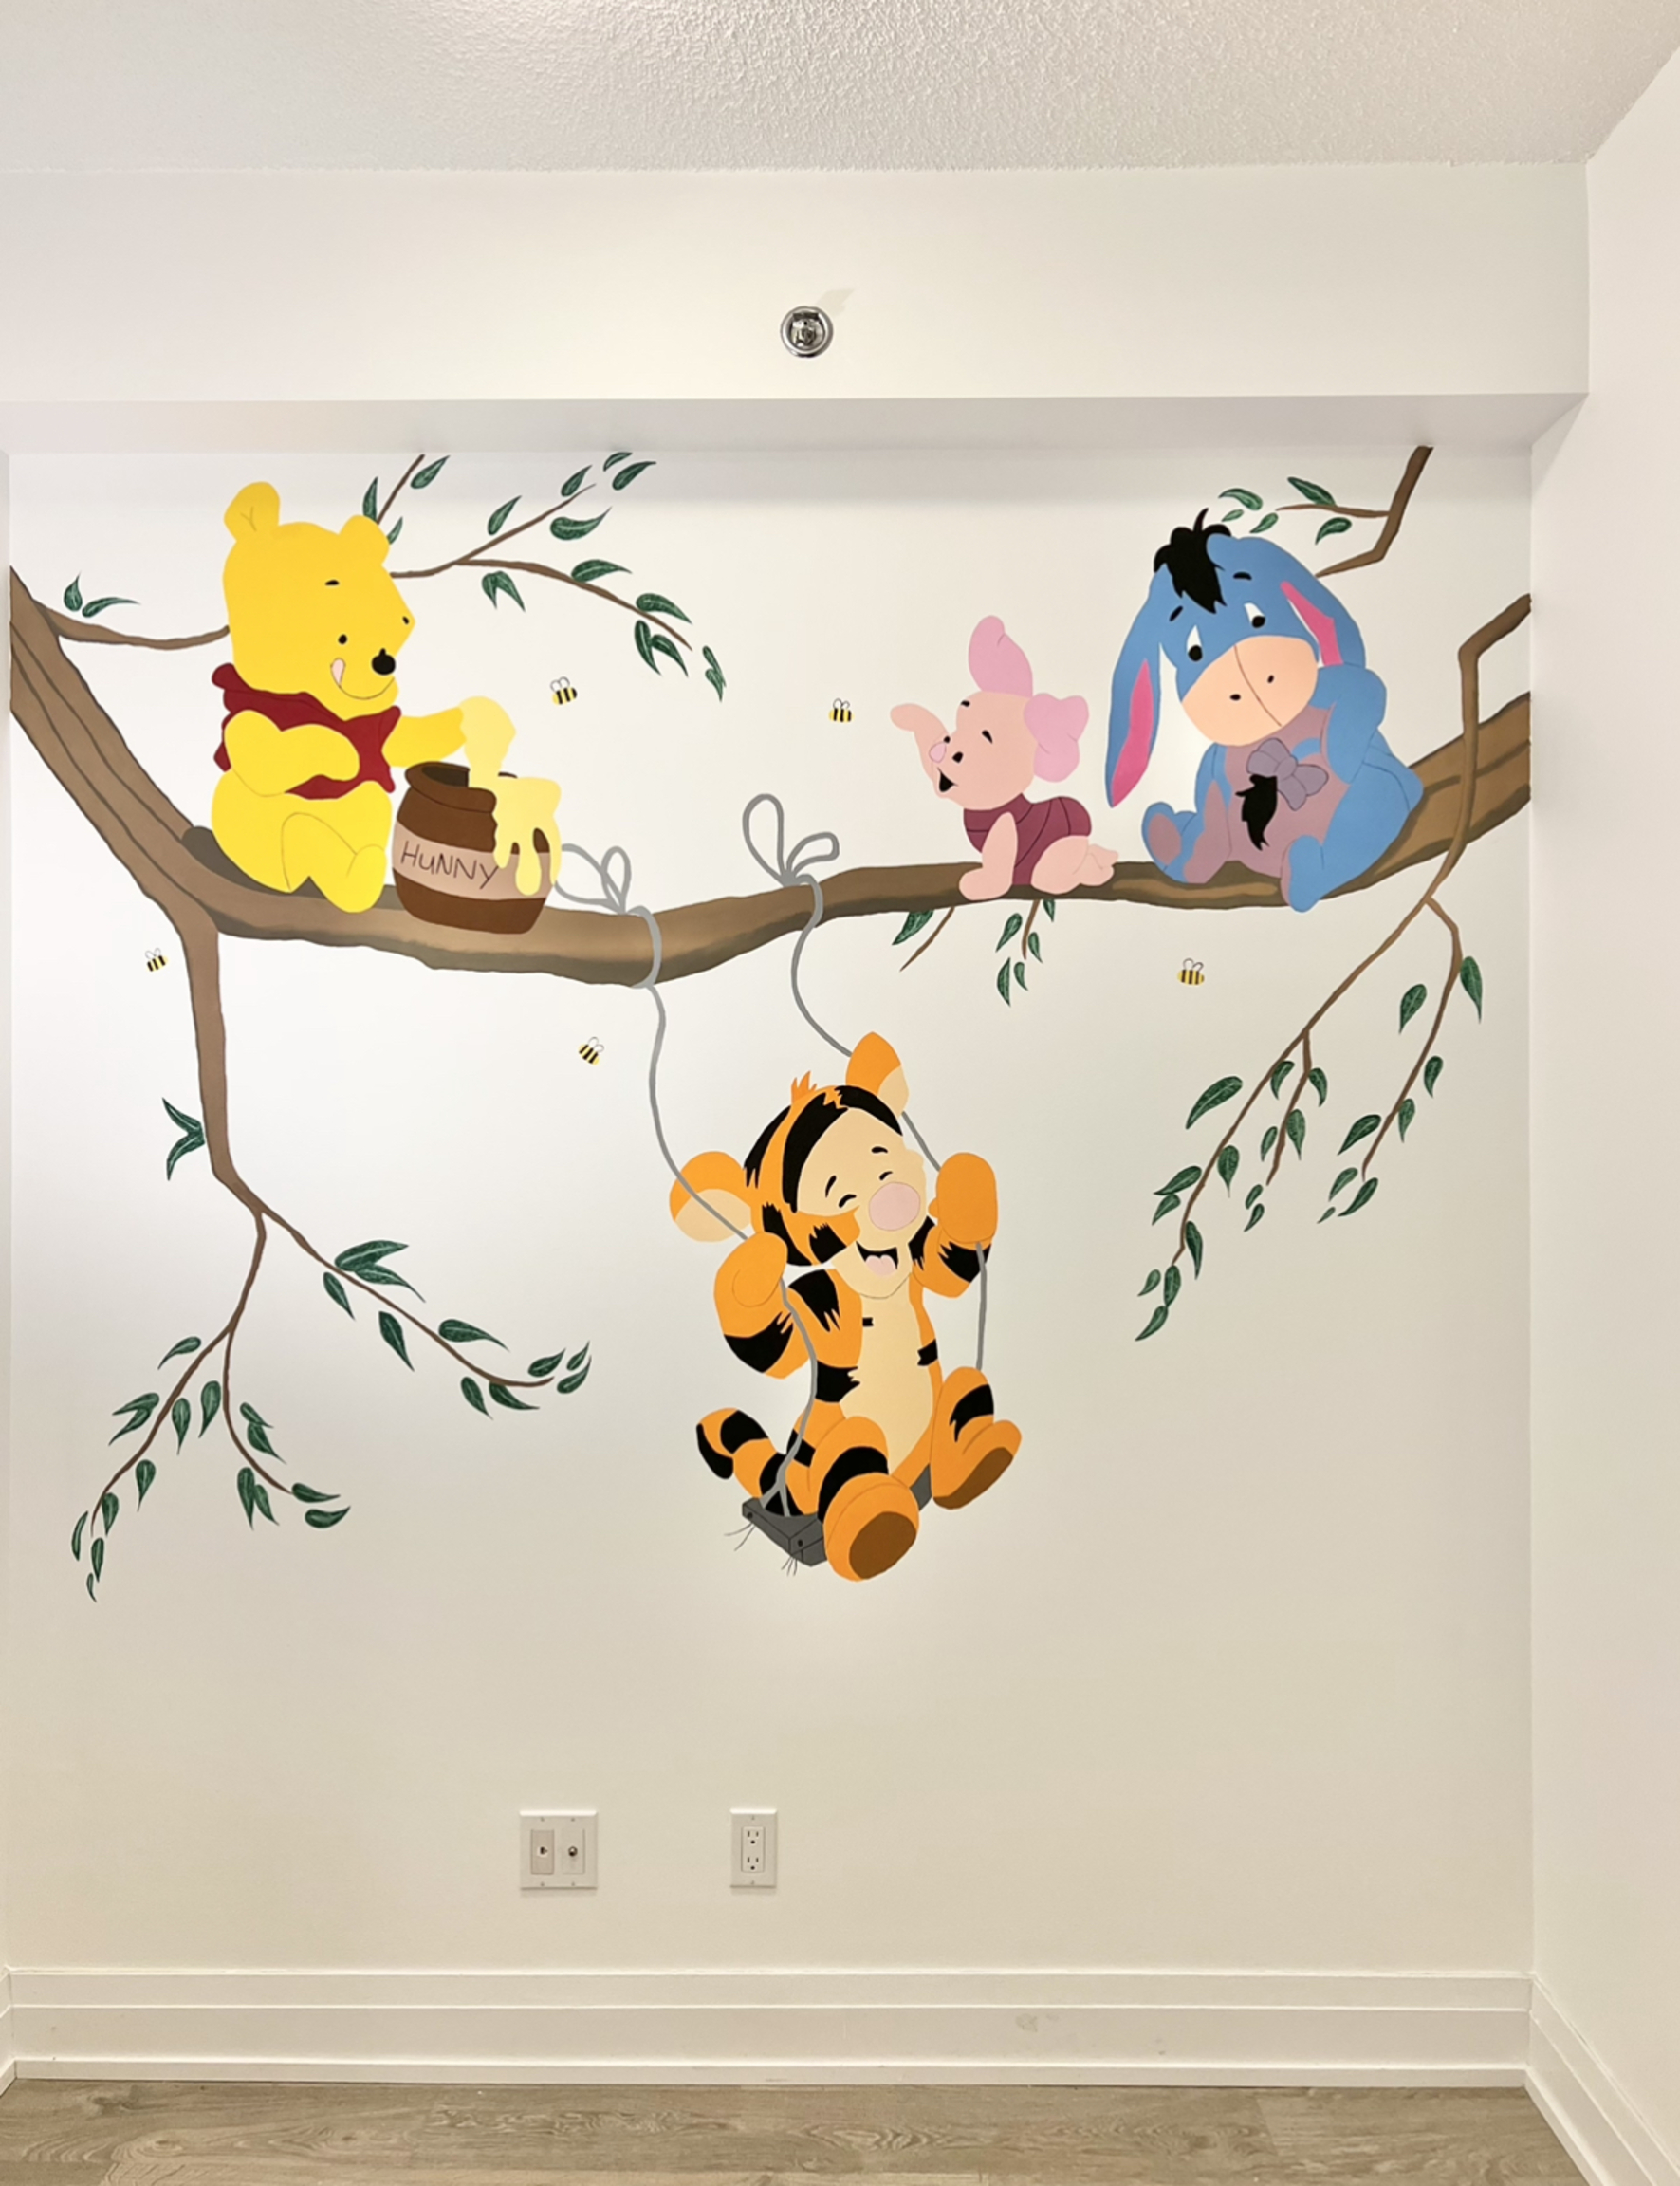
The time has finally come for the nursery painting reveal! I teased the topic and a picture on my Instagram of what I was working on and the time has finally come to show you what I did. I am so excited to be able to share this with everyone, it really was such a labour of love. Read below on how I painted a Winnie the Pooh mural for our baby’s nursery.
If you didn’t already know, the husband and I decided to keep the gender of our baby a surprise until birth. We really wanted it to be a surprise and it was definitely worth the wait. However, one thing I always knew I wanted to do was paint a mural type scene on a wall in the baby’s room which was always planned to be a neutral theme. Growing up I was obsessed with Mickey and Minnie and always thought that would be what I painted in baby’s room. But when the time came to get things started, I just wasn’t drawn to any of the Mickey inspo I was finding. Time started to creep up and I knew I had to make a decision in order to get started and so I began exploring Winnie the Pooh options and I immediately fell in love.
How to Start Your Themed Nursery Wall
Like I mentioned above, you need to have an image or theme in mind for your design. Pinterest was a great resource for seeking images of what inspired me and what I’d love to see on a wall. I finally found a Winnie the Pooh picture I loved but it was missing Piglet, a main character that I wanted in the mural. I found another image of piglet and roughly mapped out how to incorporate it into the main picture. Once I settled on the design I loved, the real planning began. These two pictures below were the ones I chose and worked from.


What You Need to Begin Your Mural
In order to actually start the process, you need to figure out how you will get your inspiration image onto the actual wall. Unless you’re an artist/painter and can do all this free hand, I suggest using the method I took which essentially was tracing the image onto the wall and then paint by numbers.
My brother had a projector that I borrowed (you can find one similar on Amazon like this one) and I used this to get the image onto the wall. This process is quite critical in getting it perfectly how you want it because once you start tracing the image, there is no turning back. I don’t recommend doing half of the image one day and then finishing it off on another day. Choose a day where you have a good chunk of time to dedicate to tracing your image. If you don’t, you may run into not being able to line up the image exactly the way you had it originally, resulting in a slanted, off-centred image on your wall – and you don’t want that. Also, take it from me who slightly moved the chair the projector was on and then spent an hour or so lining up the image again…that was fun. So do yourself a favour and dedicate a day just to transferring the image onto the wall.


Once you’re happy with how the image is displayed on the wall, I recommend tracing the design in the colours you’ll be painting them. For example, when tracing Tigger, I used (with a very light hand) an orange pencil crayon on parts where he was orange. On the parts where he had black stripes, I used a black pencil crayon, again with a very light hand. Doing this will help you later on when you’re painting and keep you on track of what colours are going where. Using a pencil would result in the colour showing and not actually being able to erase the marks once painted. Using pencil crayons the colour of the image will allow the tracing to blend into the paint colour. It was a small but very helpful step. It also saved time later on when you would be questioning what colour goes where – this is what I meant by paint by numbers.
Once you have your image traced on your wall, you’re good to start painting!
Painting the Mural – What You Need to Know
Now that you’re at the fun part of painting, there are some things to keep in mind. Below are tips on how to bring your mural to life.
1. What Paint & Brushes to Use
You can absolutely go to your nearest Benjamin Moore to grab the colours you need but I’m here to save you a few (hundred) bucks. Good ol’ dollar store acrylic paint will be absolutely fine for painting your mural. The tricky part with using paint from the dollar store however, is they may not have all the colours you need. At that point, you can choose to mix colours for the desired shade you need, or spend a few more bucks and go somewhere like Michael’s or Walmart where they have more colour options. I did all of these. Also, buy more than you think you need. Lesson learned that you don’t want to be mid painting and run out of a colour to only stop what you’re doing and have to go buy more. A-nnoying.


While we’re on the topic of actually painting, you’re going to need a set of paint brushes. Again, I bought a mix of dollar store and Michael’s brushes. Both worked great for quality, it was just the difference in how thin or fat you needed your bristles. I often worked with small, thin brushes because I found them easier to be more detailed with. When painting larger parts of something, I opted for a bigger brush but no need to spend a fortune on your tools.
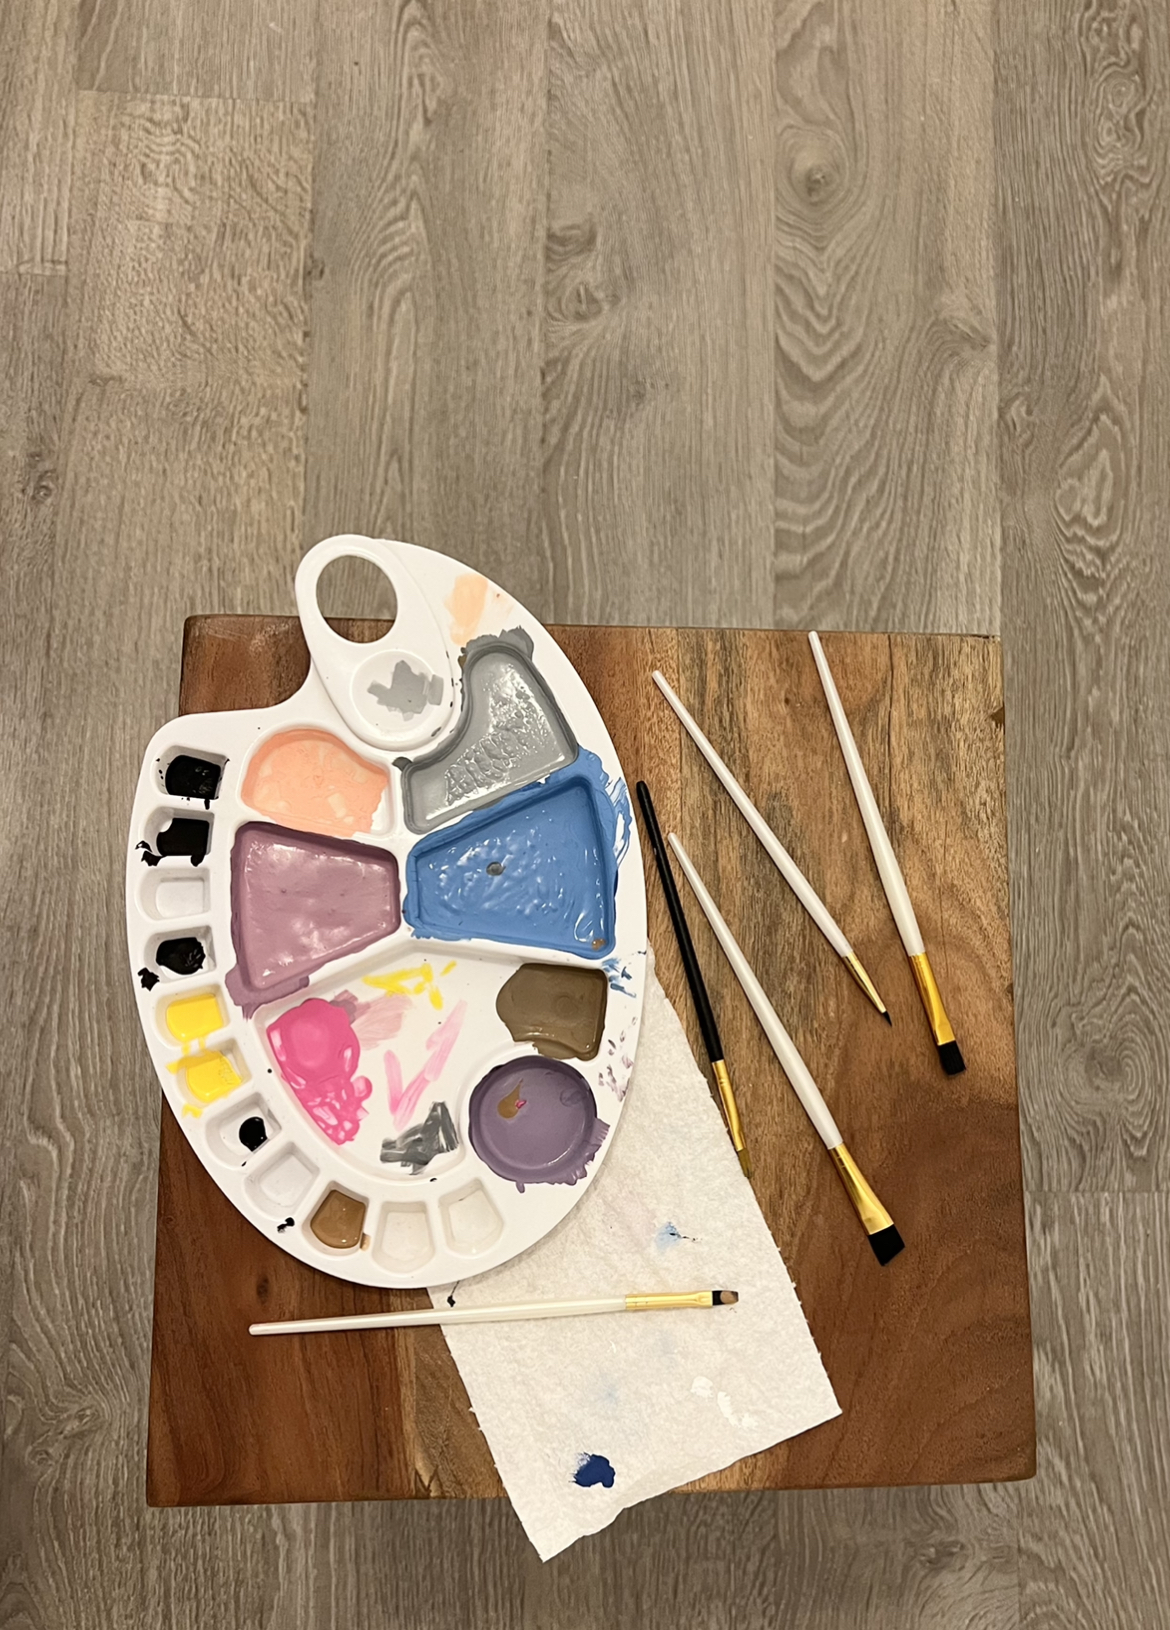
One last tip about painting, I bought a small paint tray from the dollar store as well which turned out to be super handy. It allowed me to have proper divides for colours and gave me a place to put multiple colours on on one tool. Highly, highly recommend.
2. Have a Timeline in Place
Painting a mural can get extremely time consuming. I started this process in March of 2022 and didn’t finish until a week before baby came – May 2022. My best advice would be to start a character and plan to finish it in that sitting. If you’re up for it, you can dedicate a day at a time to one specific character or area which will help keep you in check with timing.
Another reason why I would suggest doing one character in one sitting is because if you’re mixing paint for a specific shade, you don’t want to pause and then try to match the exact shade again the next day. It may be off a bit and you want the colours to look as consistent as possible and completing it in one sitting helps eliminate that problem. However, if you do plan to complete a section in one sitting, make sure you give yourself enough time to do so. An example of time reference – I started painting Tigger at 9:30am and didn’t finish him until about 6pm that evening. It’s a long process but very worth it. It also took that long because I did about 3 coats of paint to make sure the colours weren’t streaky and had a nice boldness to them. It may not be needed for you but find what works for your colours and go with it!


Also, if you’re the pregnant one and the one who will be doing most of the mural, try starting this as early in your pregnancy as possible. Take it from me that painting at nine months pregnant sure was interesting.
3. Don’t Be Afraid to Play
Once your image had been traced on the wall and you now have your guide, don’t be afraid to paint a little outside those lines. In some moments, I stressed that there were parts that weren’t exactly the way the original image was but in do time, I began to get my groove and make the painting my own. It’s important to remember that the tracing is there to help, no doubt, but don’t be afraid to use your imagination when you need to. The mural most likely won’t be exactly the way the picture looks, but trust your process and it’ll turn out just perfect.
Trying to find the perfect shade might be challenging sometimes. For Piglet, it took me quite a few tries to get the perfect shades of pink. As you can see from the second picture, I explored two different shades and went with the one I liked best for the ears. Don’t be afraid to experiment different colours – keep at it and you’ll achieve the perfect shade. The same happened with Eeyore – I can’t even tell you have much paint I mixed to get his colour. But work with what you have and it’ll come together.


4. Ask for Help If You Need It
When I first found the image I wanted to paint, I began getting intimidated by all the shading and details that the picture had. My best friend is a great painter and so I asked for her opinions and advice. I asked her how she would do certain things like shading and what her thoughts were on how I should go about it. I even reached out to one of my aunts who is also talented in this department to assist me with painting it all. I was so scared to mess it up, however, I eventually found a way to be comfortable with it and proceeded on my own. I really wanted the mural to be something done by me just for baby. But all this to say that getting help in completing the mural is okay. It’s still a beautiful project you’ll have done for your baby and nothing will take away from that.
5. Stay Slow & Steady
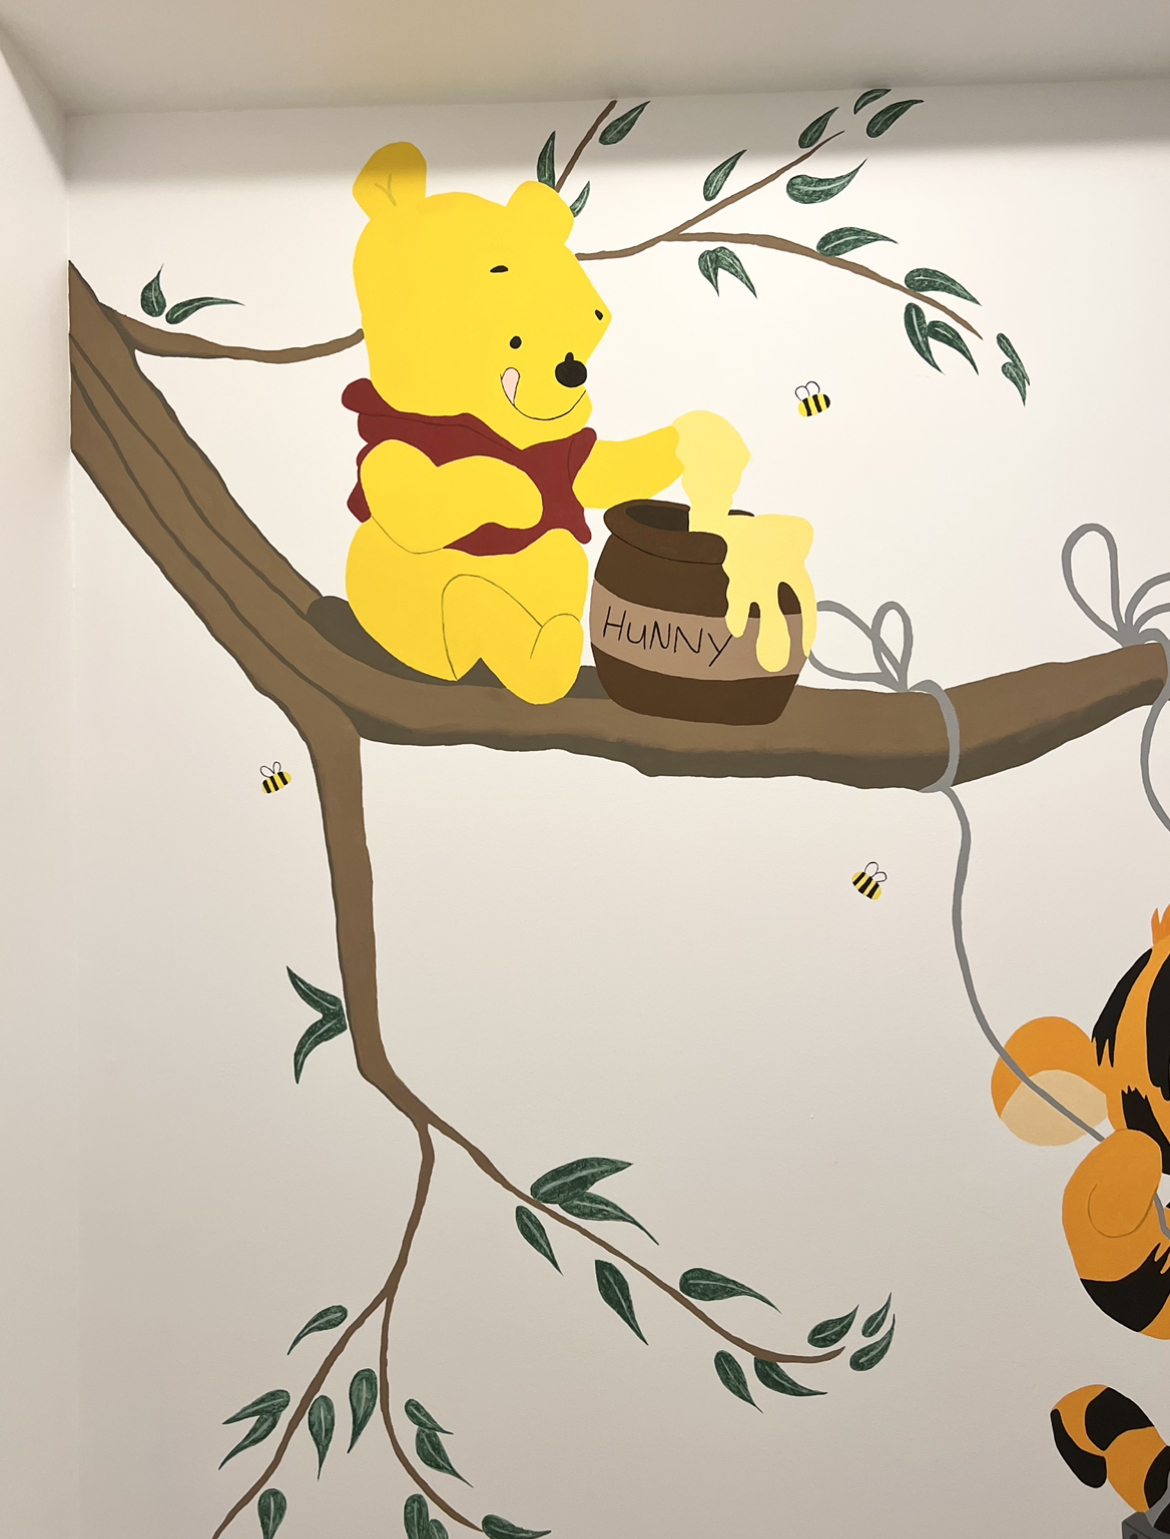
As much as I wanted to fast forward the process in some moments, it’s important to remember that slow and steady is the best way to go about painting your mural. Take your time, take breaks so your eyes don’t go sideways, and remember to breath throughout it all – it can get stressful. When I painted the characters, there were moments when I had to use the smallest paint brush I had to ensure that the small areas were getting painted nicely. This is an example of why the process can take so long. But the slower you go, the better the painting will be and the less mistakes you’ll make that will need to be covered up afterwards. Put on a good playlist and zone out the world while you peacefully paint for your baby.

6. Add Your Personal Touch
Painting this mural for our baby was something I always dreamed of doing – it was important to me and something I wanted to do for my baby. So with that being said, I did it all myself. Sure, my husband prepped the wall by removing the wall paper and did the undercoat of the white paint (we chose Chantilly Lace by Benjamin Moore), but the entire mural was painted by myself. The husband most definitely offered to take over when it became later in my pregnancy but I was determined to finish what I started.
With that being said, I also wanted to leave a little signature on the mural. Something that could be seen but only if you looked close enough. I wrote, “painted just for you by mommy <3” on one of the branches – a little message just for my baby. Just like any painting, I wanted to have a little signature on it that it was something I did for baby. It was such a huge project that I absolutely loved every second of doing and I wanted my baby to know that.
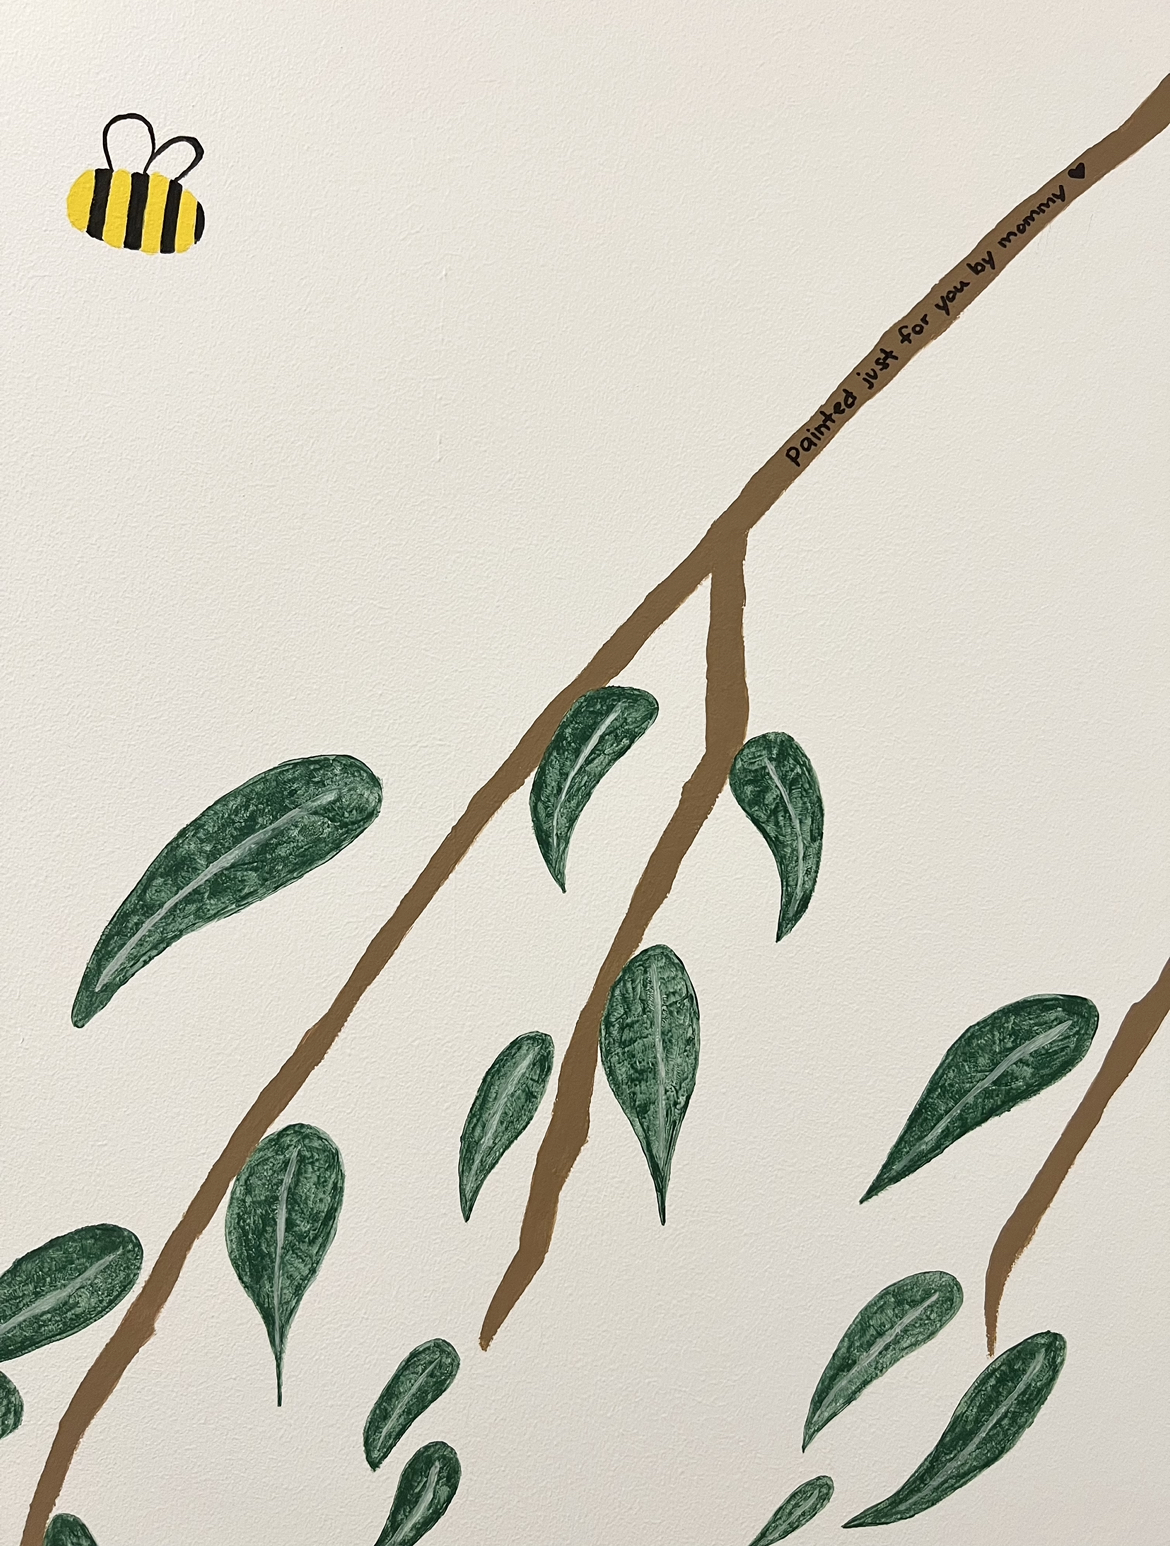
Put something on the mural that indicates your personal touch. It could be as simple as your initials – anything, really. You did all this work, don’t be afraid to sign off on it.
Sit Back & Enjoy
Once you’ve finished your mural, step back and give yourself a pat on the back – it’s not easy! I was so freaking proud of myself for painting this and I couldn’t wait to hang out with baby in the room. I can’t wait for the day where she’d old enough to understand the characters and we can talk about the mural. I hope she loves it just as much as I do <3
